Setting up a Blink Outdoor 4 camera becomes much easier when the process is understood in simple steps. Many homeowners look for a reliable way to keep an eye on their surroundings without dealing with complicated tools.
This guide explains how to mount the camera securely so it stays steady through wind, rain, and daily activity. The focus stays on creating a smooth experience, whether the goal is watching the front yard, the driveway, or a quiet corner at the back.
Each step highlights the best placement practices, the right mounting method, and the small details that keep the camera performing at its best. With the right approach, a dependable security setup becomes possible for any home.
Understanding the Blink Outdoor 4 Camera Features
- The camera delivers crystal clear HD video, allowing detailed monitoring of any outdoor space.
- A long lasting battery life keeps the camera active for extended periods without frequent changes.
- The infrared night vision feature ensures clear visibility even in complete darkness.
- A strong motion detection system sends instant alerts whenever movement is captured.
- The weather resistant build protects the device from rain, heat, dust, and outdoor conditions.
- Two way audio makes communication easy through the Blink app.
- The camera supports wide angle coverage, capturing more area in a single frame.
- Smartphone app integration allows live viewing, recordings, and full control from anywhere.
- Easy wireless setup ensures quick installation without complicated tools or wiring.
Tools and Materials Needed to Mount Blink Outdoor 4 Camera
A few simple items make the mounting process smooth and secure while ensuring the camera stays firmly in place for reliable outdoor performance.
• Blink Outdoor 4 camera
• Mounting bracket
• Screws
• Screwdriver
• Drill with suitable drill bits
• Wall anchors for stronger grip on hard surfaces
• Measuring tape
• Pencil for marking spots
• Stable ladder for higher placements
• Cleaning cloth to clear dust before installation
Choosing the Right Location for Your Camera
Selecting the best place for a Blink Outdoor 4 camera shapes the entire security experience. A good spot allows the device to capture clear activity without blind gaps and keeps it safe from unnecessary damage. The most effective placement usually stays at a height that prevents tampering while still delivering a complete view of the surroundings.
A position facing the entry points provides strong coverage, especially when monitoring the front door, the driveway, or the backyard gate. These areas hold the highest activity and benefit from consistent visibility.
The camera also performs well when placed near the garage area, where movements often happen during early morning or late evening hours. Walls with a stable structure help steady the camera, while locations with enough sunlight support better battery efficiency. With thoughtful placement, the setup delivers dependable protection throughout the day.
Step-by-Step Guide: How to Mount Blink Outdoor 4 Camera on Walls
Preparation and Safety Check
A smooth installation begins with simple safety steps. Clearing the work area, checking the ladder, and ensuring the surface is stable prevents mistakes. This preparation keeps the process comfortable and protects the camera during mounting.
Choose the Right Location
A strong location improves performance by giving the camera a clear view of entrances and pathways. Selecting a high yet reachable spot reduces tampering and provides a balanced view of important outdoor areas.
Gather Tools and Materials
Having every tool ready creates a steady workflow. A drill, screws, anchors, mounting bracket, and a measuring tape help the device stay firmly placed. This preparation removes delays and makes installation smoother.
Check Power and Connectivity
Before mounting, checking signal strength prevents placement problems later. A stable connection supports motion alerts and live view without interruptions. This simple step ensures the camera communicates correctly with the Blink system.
Verify Mounting Height and Field of View
Selecting the right height improves detection and clarity. A slightly elevated angle helps cover wide areas without missing movement. This careful positioning increases the overall effectiveness of outdoor monitoring.
Mark Mounting Points with Precision
Proper markings guide the entire installation. Using a pencil and measuring tape ensures straight alignment and correct spacing. Accurate marks avoid crooked mounting and keep the camera visually balanced on the wall.
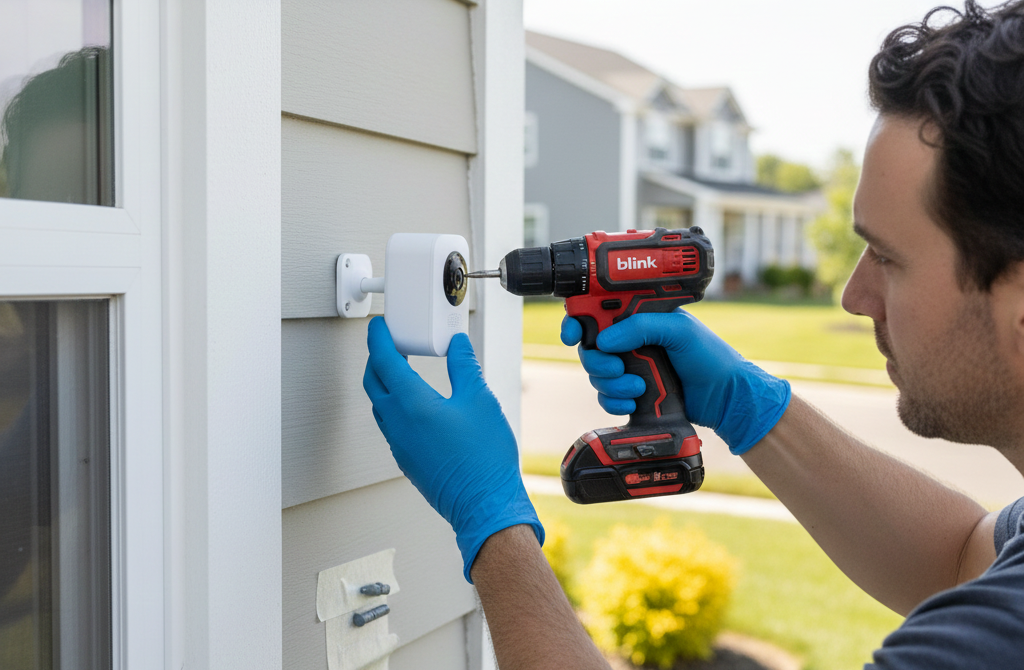
Drill Holes and Install Wall Anchors
Drilling at the marked spots prepares the wall for secure support. Wall anchors strengthen the mount, especially on hard surfaces. This step prevents loosening over time and keeps the camera firmly in position.
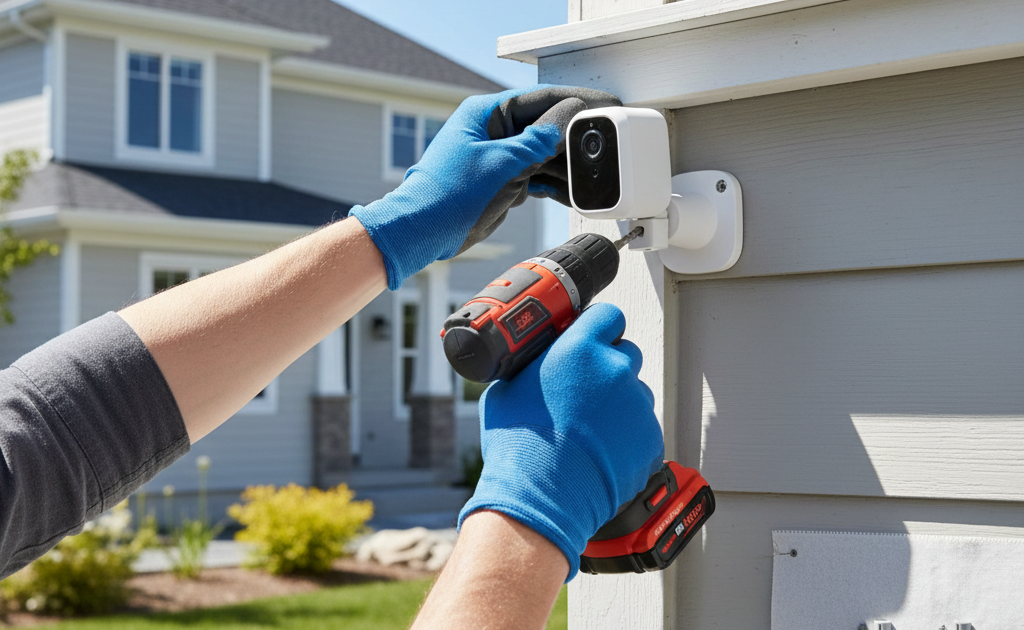
Attach the Mounting Bracket
The mounting bracket acts as the base for the device. Tightening the screws properly keeps it steady during harsh weather. A secure bracket ensures the camera stays fixed without wobbling or shifting.
Mount the Camera to the Bracket
Gently attaching the camera completes the basic installation. The design allows the camera to snap or slide into place comfortably. A firm connection keeps the device stable and ready for adjustments.
Adjust the Camera Angle
Fine tuning the angle helps capture the most important areas. Tilting or rotating the device improves visibility and reduces blind zones. A correct angle creates balanced coverage for daily monitoring.
Secure Cables and Add Weatherproofing
Any exposed parts need protection from rain and dust. Securing cables and sealing openings improves long term durability. This extra care supports steady performance across all seasons.
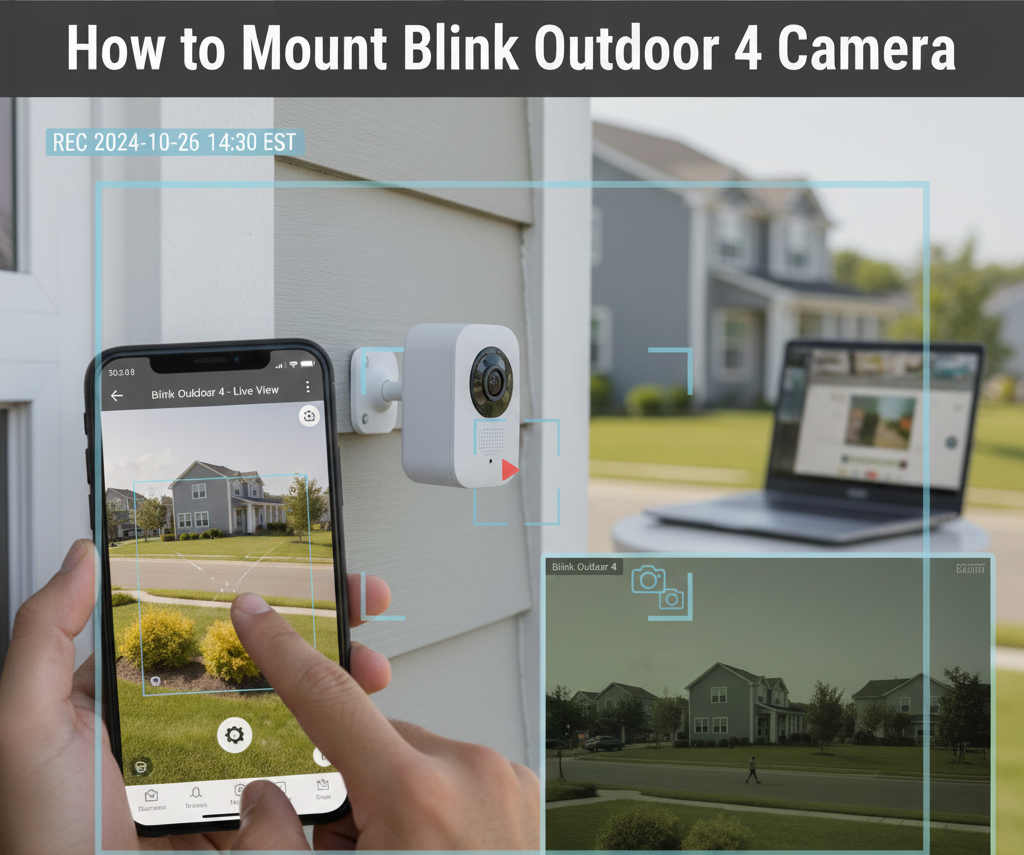
Connect Camera to the Blink App
Opening the Blink app and linking the device activates essential features. Live view, motion alerts, and custom settings become available instantly. This quick step integrates the camera into the home system.
Run Live View and Motion Tests
Testing confirms that every angle and detection zone is working correctly. Live view helps identify any adjustments needed for clarity. These checks ensure the camera captures accurate activity.
Troubleshoot Common Issues
Sometimes minor setup problems appear, such as weak signals or loose fittings. Addressing these early avoids performance loss. Quick fixes help the camera operate smoothly without interruptions.
Final Inspection and Regular Maintenance
A brief inspection ensures the installation is complete and secure. Cleaning the lens and checking the mount occasionally keeps performance high. Simple maintenance supports clear footage throughout the year.
Mounting on Different Surfaces: Wood, Brick, and Concrete
Mounting on Wood
Mounting a Blink Outdoor 4 camera on wood is usually the simplest and most beginner friendly option. Wood accepts screws easily, which means the mounting bracket stays firmly in place without the need for anchors.
A clean and dry surface helps the screws grip deeper, creating long lasting support during changing weather. Wood also absorbs vibrations well, reducing movement and keeping the camera steady. This makes wooden walls, fences, and beams strong locations for reliable outdoor monitoring.
Mounting on Brick
Installing on brick needs careful preparation because the surface is harder and uneven. Drilling pilot holes using a masonry bit prevents cracks and ensures clean entry points. Wall anchors become important here because they create a solid grip inside the drilled holes.
Once the anchors sit properly, the screws tighten smoothly and keep the bracket stable. Brick walls offer excellent durability, making them ideal for long term camera placement in high activity outdoor spaces.
Mounting on Concrete
Mounting on concrete requires the most strength and precision because the material is dense and inflexible. Using a powerful drill with a suitable masonry bit helps create accurate holes without damaging the surface.
Heavy duty wall anchors are essential since they lock the screws tightly inside the concrete. Once secured, the bracket remains extremely stable even during intense weather or strong wind. Concrete surfaces provide exceptional firmness, making them excellent for permanent and highly secure camera installations.
Adjusting the Camera Angle for Optimal Coverage
Setting the right angle for a Blink Outdoor 4 camera shapes how well the surroundings are captured. A slight downward tilt works best because it reduces empty sky from the frame and focuses attention on walkways, driveways, and entry points.
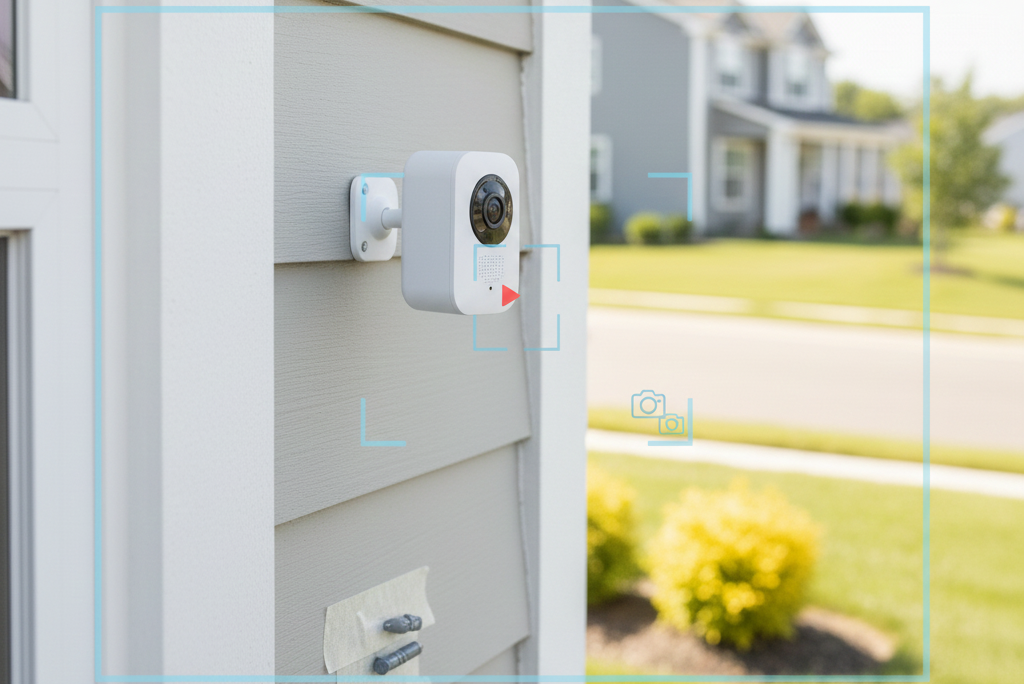
Positioning the camera too high may miss close movements, while placing it too low can limit the viewing range. The most balanced angle usually allows a clear line of sight across the area without obstructions from plants, walls, or outdoor furniture. A quick live view test through the Blink app helps confirm whether the angle covers every important corner.
Adjustments should continue until movement appears naturally within the frame. When the angle feels balanced and the view looks steady, the camera starts delivering reliable footage with clear activity tracking throughout the day.
Weatherproofing and Securing Your Blink Outdoor 4 Camera
Protecting a Blink Outdoor 4 camera from outdoor elements ensures long lasting performance. Even though the camera is designed to withstand rain and dust, additional care improves durability. Sealing any small gaps around the mounting bracket prevents water from entering and reduces the risk of corrosion.
Tightening screws firmly keeps the camera stable during wind or vibrations. Positioning the device slightly under eaves or sheltered areas can further protect it from direct exposure to heavy rain or sun. Regularly checking the mounting and cleaning the lens removes dirt, debris, or spider webs that may affect visibility. By combining careful placement with simple protective measures, the camera continues to deliver clear and reliable monitoring in all weather conditions, providing peace of mind throughout the year.
Troubleshooting Common Mounting Issues
- Camera not powering on – Check battery installation and ensure batteries are fully charged before mounting.
- Weak Wi-Fi connection – Move the camera closer to the router or use a Wi-Fi extender to maintain stable connectivity.
- Loose mounting bracket – Tighten screws and, if necessary, use wall anchors for extra support, especially on brick or concrete.
- Tilted or crooked camera – Adjust the bracket carefully and use a level to ensure the camera is perfectly straight.
- Obstructed view – Remove plants, furniture, or other objects blocking the camera’s line of sight.
- Motion detection not working properly – Reposition the camera angle and test detection zones using the Blink app.
- Water or dust infiltration – Ensure all gaps are sealed and check for proper weatherproofing around the mount.
- App not syncing – Restart the Blink app or reconnect the camera to the network.
Helpful Tips for a Smooth Blink Outdoor 4 Camera Installation
- Plan the layout first – Identify key areas to monitor before starting the installation.
- Check Wi-Fi strength – Ensure the chosen location has a strong and stable signal for reliable alerts and live view.
- Use a level – Keep the camera straight during mounting to avoid skewed footage.
- Test the angle before securing – Adjust tilt and direction using live view to cover all critical areas.
- Secure the bracket firmly – Tighten screws and use anchors on hard surfaces to prevent movement.
- Keep the lens clean – Wipe away dust or debris for clear recordings.
- Avoid direct sunlight – Position the camera to reduce glare and overheating.
- Regularly check battery status – Replace or recharge batteries on time to maintain continuous monitoring.
- Weatherproof effectively – Seal gaps and place under eaves if possible for extra protection.

Sum Up
Mounting a Blink Outdoor 4 camera correctly ensures reliable home security and peace of mind. Each step, from selecting the right location to adjusting the camera angle, contributes to clear coverage and efficient monitoring. Proper installation on surfaces like wood, brick, or concrete keeps the device stable, while weatherproofing measures protect it from rain, dust, and harsh outdoor conditions.
Troubleshooting common issues early prevents interruptions, and following helpful tips ensures smooth setup and long lasting performance. A well positioned and securely mounted camera captures important activity without blind spots, providing accurate alerts and dependable recordings.
Regular checks and maintenance, combined with proper placement and angle adjustment, maximize both safety and functionality. With careful attention to these details, the Blink Outdoor 4 camera becomes a highly effective tool for continuous, reliable outdoor surveillance.
FAQs
For optimal coverage, place the camera between seven and nine feet high. This height prevents tampering while capturing clear footage of entrances, driveways, and walkways.
Yes, the camera can be mounted on both surfaces. Using a masonry drill bit and wall anchors ensures a secure and stable installation on harder materials.
Position the camera under eaves or sheltered areas, tighten screws securely, and seal any gaps around the mount. Regular cleaning also helps maintain visibility and performance.