The first time I unboxed my Ring Doorbell, I’ll admit, I felt a mix of excitement and nerves. I had seen neighbors using theirs to keep an eye on packages and visitors, and I wanted that same sense of security. But staring at the sleek little device in my hand, I wondered if setting it up would be too technical for me.
I’m not precisely a wiring expert, and the thought of drilling into my wall wasn’t exactly thrilling. Still, I reminded myself that this gadget was designed for regular people, not just tech pros. So, I rolled up my sleeves, grabbed the tools, and started figuring it out step by step. It turns out to be way easier than it looks.
What You Need: Tools and Equipment for Setting Up Your Ring Doorbell
When I first decided to set up my Ring Doorbell, I thought I’d need a complete toolbox, maybe even some fancy electrician’s kit. To my surprise, the essentials were pretty straightforward. Having the right tools and equipment nearby makes the entire process smoother and less stressful you won’t find yourself running back and forth to hunt for a missing screwdriver in the middle of the installation.
Here’s what you’ll need:
- Ring Doorbell device (of course)
- Mounting bracket (usually included in the box)
- Screwdriver (a Phillips head works fine)
- Drill with drill bits (if mounting on brick, stucco, or concrete)
- Level tool (to keep it straight)
- Anchors and screws (provided with the Ring kit)
- Charging cable (for battery-powered models)
- Your smartphone (with the Ring app installed)
Troubleshooting Common Setup Issues
Doorbell Not Connecting to Wi-Fi
When I first tried to set mine up, the doorbell refused to connect. Nine times out of ten, this happens because the Wi-Fi password was mistyped or the signal isn’t strong enough. Double-check your password, and if the signal’s weak, try moving your router a little closer.
Weak or Dropping Wi-Fi Signal
I learned quickly that walls and distance matter. If your Ring keeps disconnecting, it’s usually because the Wi-Fi can’t reach consistently. A simple fix is adding a Wi-Fi extender to cover that dead spot near your door.
Video Feed is Blurry or Not Clear
The first time I saw a foggy image, I thought something was wrong with the camera. Turns out, it was just a smudge on the lens. Wiping it with a microfiber cloth or improving the lighting near your door can make the video sharp again.
Doorbell Not Powering On
This one scared me the most—I thought I’d broken it. Usually, it’s just that the battery wasn’t charged fully, or the wiring isn’t tight enough if it’s a hardwired model. Give the battery a proper charge, and it often springs back to life.
App Not Detecting the Device
Sometimes the Ring app acts a little stubborn. Restarting your phone and the doorbell often refreshes the connection. If that fails, uninstalling and reinstalling the app usually does the trick.
Delayed Notifications or Alerts
I once had my phone buzzing almost a minute late—it defeats the purpose of a smart doorbell. This usually means the Wi-Fi is lagging. Check your internet speed or restart your router, and the notifications speed up again.
Two-Way Audio Not Working Properly
Talking to someone at the door and not hearing back from them is frustrating. Most of the time, it’s either low internet speed or the microphone permissions in your phone settings. Fix those, and the audio becomes crystal clear.
Battery Drains Too Quickly
At first, I thought my Ring’s battery was faulty, but I later learned it was the motion detection feature working overtime. If your device is facing a busy street, it records constantly and drains faster. Adjusting the motion zones helps the battery last much longer.
Problems with Motion Detection
I once missed a delivery because my Ring didn’t alert me. Fine-tuning the motion sensitivity and zones in the app typically resolves this issue. Sometimes, less sensitivity avoids false alerts, while more picks up what you actually need.
Device Not Updating Firmware
If your doorbell feels “stuck,” it might not be updating correctly. Keeping it charged and ensuring it’s connected to stable Wi-Fi helps updates install automatically in the background.
How to Set Up Ring Doorbell: Step-by-Step Installation Guide
When I first set mine up, I was half-expecting a complicated process with wires all over the place. But once I followed the steps, I realized Ring designed it to be beginner-friendly. Here’s how you can do it too.
How to Install Ring Doorbell Wireless
- Charge the Battery
The very first thing I did was plug in the battery using the USB charging cable included in the box. It takes a few hours to fully charge, and you’ll see a green light when it’s ready. - Download the Ring App
I opened the app store on my phone, downloaded the Ring app, and created an account. The app guides you through the setup step by step, almost like a personal assistant. - Add Your Device
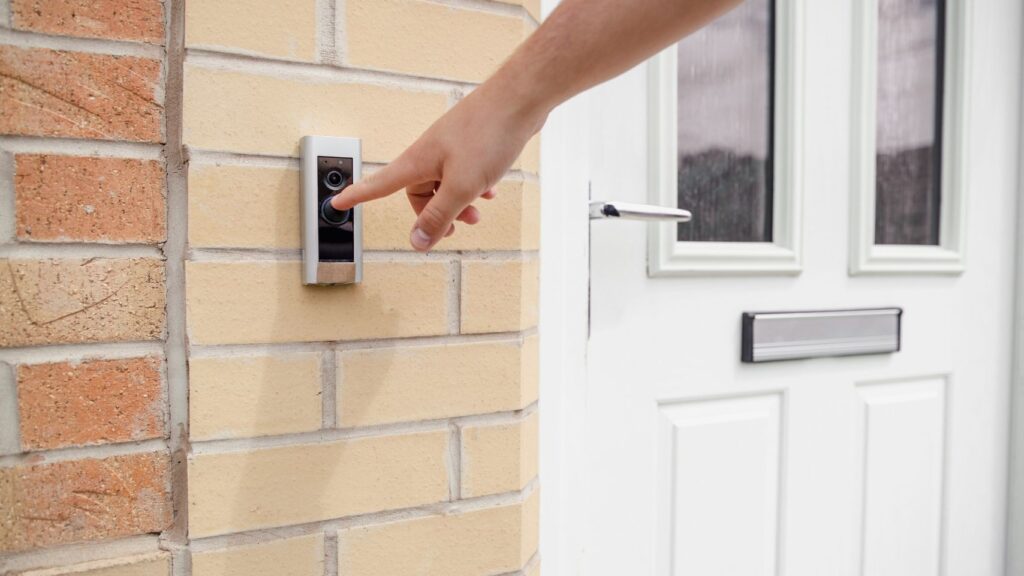
Inside the app, I tapped “Set Up Device,” scanned the QR code on the back of the Ring, and gave it a name (like “Front Door”). - Mount the Bracket
Using the screws and anchors from the box, I attached the mounting bracket to the wall next to my door. For brick or stucco, you’ll need a drill. - Snap in the Doorbell
Once the bracket was up, I slid the Ring Doorbell onto it until it clicked into place. It felt oddly satisfying! - Connect to Wi-Fi
The app asked me to choose my Wi-Fi and enter the password. Within seconds, the device was online. - Test It Out
I pressed the button, checked the video feed on my phone, and—there it was—my very first live view from the front door.

How to Set Up Ring Doorbell Wired
The wired version feels a bit more intimidating at first because, well, wires. But it’s not nearly as complicated as it sounds.
- Turn Off Power
Before touching anything, I flipped the breaker to cut power to my existing doorbell. Safety first! - Remove the Old Doorbell
I unscrewed my old doorbell and gently pulled it out to expose the two wires behind it. - Connect the Wires
The Ring Doorbell has two terminals on the back. I attached each of the old doorbell wires to these terminals. No polarity worries here you can connect either wire to either terminal. - Mount the Bracket and Doorbell
Just like the wireless version, I screwed the mounting bracket into the wall, then attached the Ring to the bracket. - Restore Power and Set Up in the App
Once everything was mounted, I turned the breaker back on, opened the Ring app, and followed the same setup steps as the wireless one adding the device, connecting to Wi-Fi, and testing the feed.
Connecting Your Ring Doorbell to Wi-Fi
When I reached the step of connecting my Ring Doorbell to Wi-Fi, it might be tricky, but the app made it surprisingly easy. After opening the Ring app, I selected “Set Up Device,” scanned the QR code, and followed the on-screen instructions.
The app asked me to choose my home Wi-Fi network and enter the password. Within a few seconds, the doorbell was online. If the connection fails, it’s usually because the signal is weak moving the router closer or using a Wi-Fi extender often fixes it. Once connected, the live video feed instantly made my entryway feel secure.
Customizing Your Ring Doorbell Settings for Optimal Use
Here are some practical ways to customize your Ring Doorbell settings so it works exactly the way you want:
- Adjust Motion Zones – Focus on specific areas (like your front porch) to avoid unnecessary alerts from passing cars or neighbors.
- Change Motion Sensitivity – Increase sensitivity to catch every movement or lower it to reduce false alerts.
- Set Up Motion Schedules – Decide when you want notifications, like during the day, and pause them at night.
- Customize Notification Preferences – Choose between push alerts, email notifications, or both.
- Enable Linked Devices – Sync your Ring Doorbell with other Ring cameras or smart devices for a complete security setup.
- Change Ringtones and Alerts – Personalize the sounds so you instantly recognize doorbell notifications.
- Enable Live View – Turn on instant access to real-time video anytime from the app.
- Check Privacy Settings – Mask out private areas (like a neighbor’s yard) to respect privacy while staying secure.
Maintaining and Updating Your Ring Doorbell: Best Practices
Keeping your Ring Doorbell in good shape doesn’t take much effort, but a little care goes a long way. Regular maintenance ensures clear video, reliable alerts, and longer battery life. Here are some best practices:
- Clean the Lens – Wipe it gently with a microfiber cloth to keep video sharp.
- Check Battery Levels – Recharge or replace when needed to avoid downtime.
- Keep Firmware Updated – Updates install through the app and improve security and features.
- Inspect Mounts and Screws – Make sure the device stays securely attached.
- Test Motion Settings – Adjust sensitivity as seasons and lighting change.
Last Words
How long does the Ring Doorbell battery last?
On average, a fully charged Ring battery lasts between 6 to 12 weeks, depending on usage and motion activity.
Can Ring Doorbell work without a subscription?
Yes, it works without a subscription, but you’ll only get live view and real-time alerts. To store and review recorded videos, you’ll need a Ring Protect Plan.
Does Ring Doorbell need Wi-Fi to function?
Yes, Wi-Fi is required for video streaming, notifications, and cloud storage. Without it, the doorbell can’t send alerts to your phone.
Can I install Ring Doorbell myself?
Absolutely. Ring is designed for DIY installation, whether wireless or wired, with all tools included in the box.